High Tide Homestead participates in affiliate programs and may earn commissions from qualifying purchases on this post. See our Disclosure page for more information.
We’ve been busy, busy, busy this past month! One of the first projects we needed to get done to move to the new cabin was grading the driveway so we could once again drive up the bluff. Once it was graded the next step was doing something to keep it from washing out during high tides. I have been researching how to do this for a few months now, and found a technique called mechanical concrete.

What Wouldn’t Work
Since we have been living in this area I’ve had plenty of opportunities to check out our neighbor’s driveways. I’ve seen gravel that needed to be rebuilt after super high tides, dirt that washed out every spring, concrete that was undercut and broke, and even logs piled to drive up that eventually disintegrated. The only thing that Mother Nature was unable to move was a massive metal ramp, but that took large equipment and a professional welder to install!
The Solution
Introducing: Mechanical Concrete! An EPA-approved way to reuse old tires (of which we found plenty on the new property!) as rubber cylinders for holding aggregate, in this case gravel, for our driveway foundation. The end product is much like geotextile or geogrid, but a lot cheaper. The tires and gravel were free. And it costs less than $100 in nuts, bolts, and washers to connect everything together.
2″ Vevor Geo Grid (Amazon affiliate link)
The Process – Step One
First we dug out the driveway to grade a little. We found a ton of old, unbroken glass bottles in it, along with other garbage. At one point the driveway was backfilled with garbage and steel barrels. Maybe to help with drainage? Or perhaps simply because it was more convenient than driving all the way to the dump.
Step Two
Then we cut the side walls out of one side of each tire. We tried using a carbide blade for this, but it dulled after one tire. It was much cheaper to use a box knife and brute strength. We went through quite a few blades too.

Step Three
Then we drilled matching holes in each tire and bolted the rows together. The top row was also bolted to a driftwood log that is partially buried in the hillside. That way the entire driveway is one piece, not 15 individual pieces.

Step Four
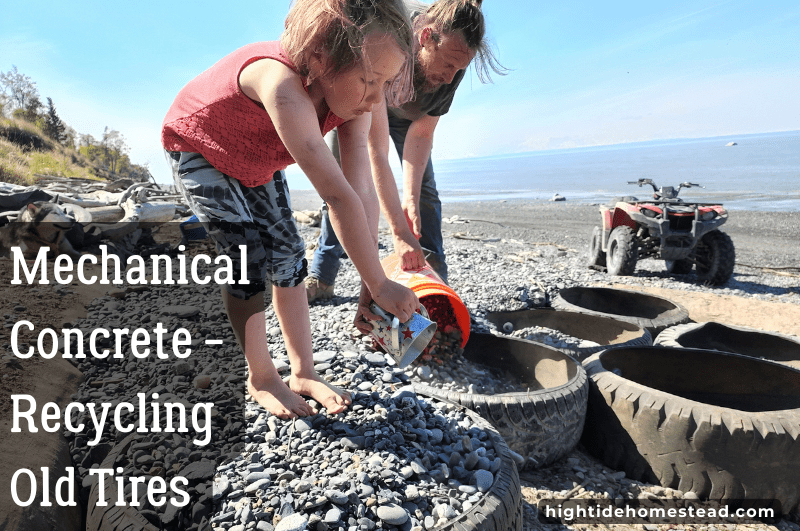
The last step was the longest, filling the tires with gravel! Luckily we were able to fill them with gravel that we had removed to place the tires. B wanted to help with her own little bucket too.

Once all the gravel was in, we test-drove it with the ATV and it worked great! The real test will come later in the fall with big tides and stormy weather. We may have to add gravel once a year or so, but that is much less maintenance than the access to our old cabin. We may add more tires both up and down our access in the future as well.

Concerns About Mechanical Concrete
A few concerns have been brought up since we installed the mechanical concrete in our driveway. The biggest is pollution since it is right on the ocean. The EPA suggests using old tires as both erosion control and road foundations, rather that having them buried in landfills, which is were most of them end up. There were also some concerns about what chemicals the tires could be leaching into the ground as well. In my research, I found studies that cited older tires (10 years) as not leaching chemicals that were toxic to any species tested vs new tires and tires just removed from a vehicle. So while tires do leach chemicals, the ones currently in use on roads are likely to be leaching more than the old ones we used for the driveway. This project was also permitted by the borough for those wondering.
High Tide Homestead participates in affiliate programs and may earn commissions from qualifying purchases on this post. See our Disclosure page for more information.
